
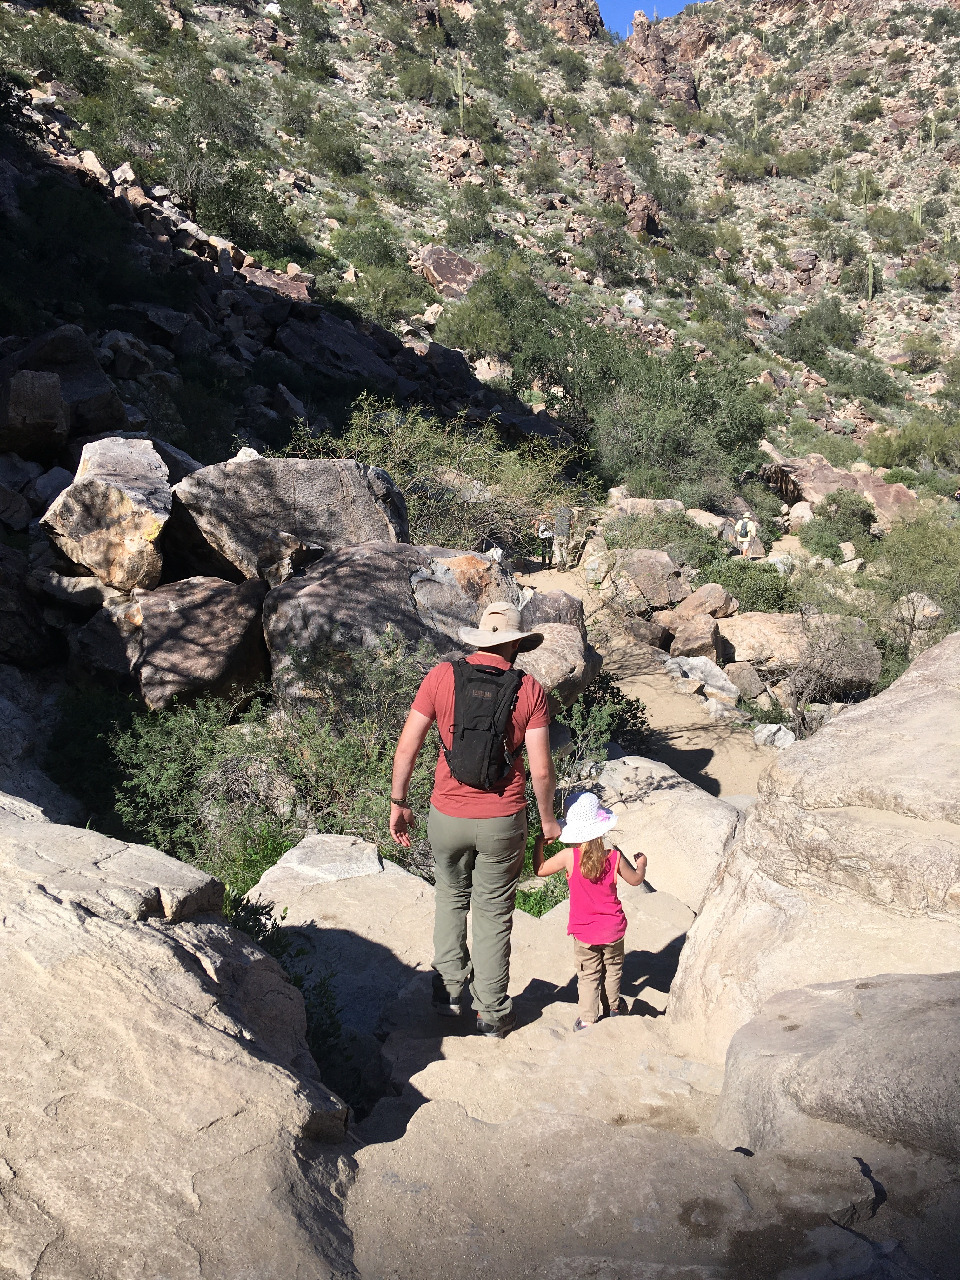
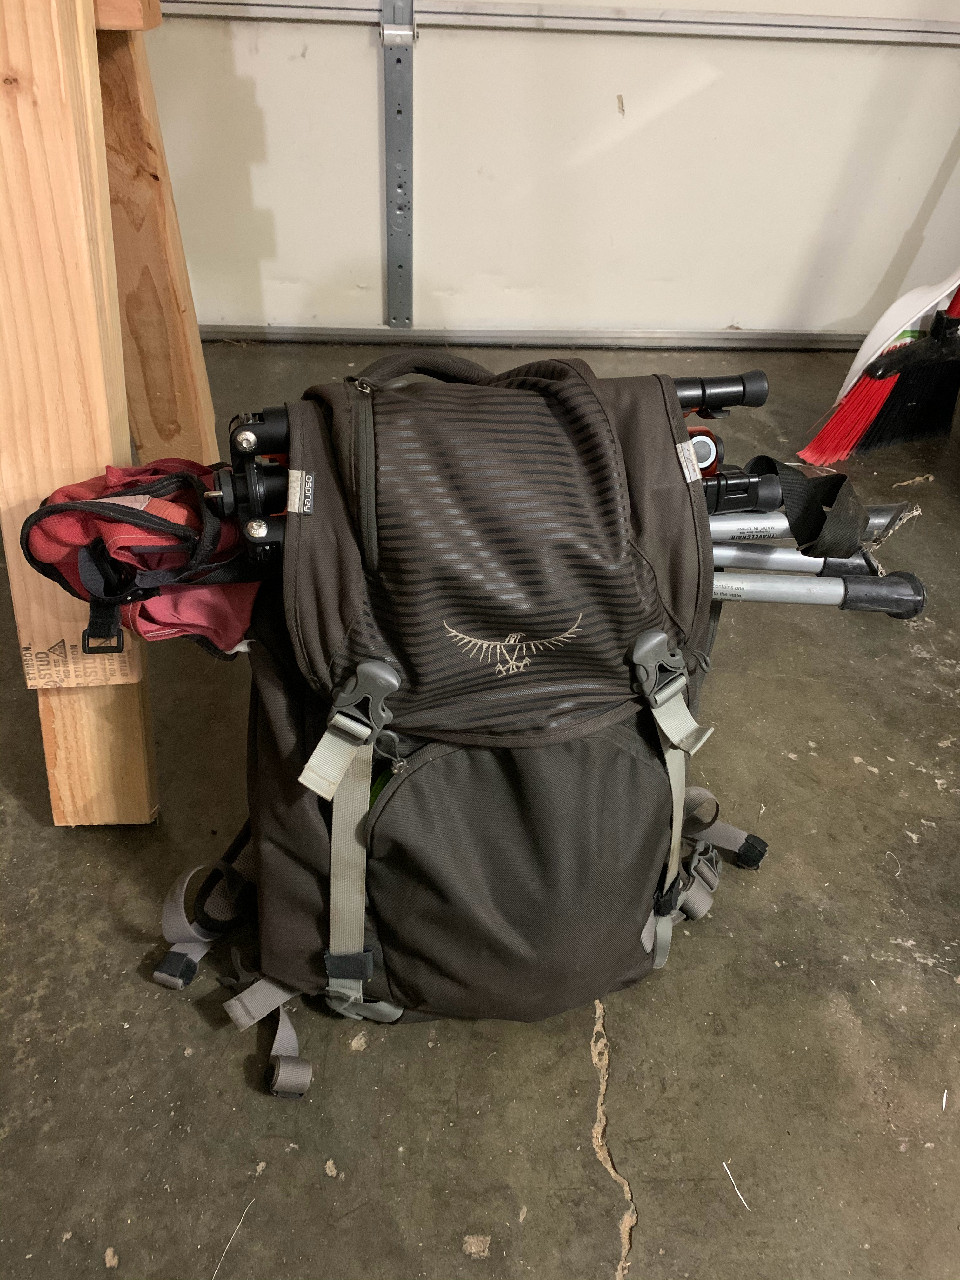
Occasionally, I get ideas that creep into my brain and won’t leave until I fully explore them. Back in February, while still enjoying the nice Arizona winters, I was hiking with my trusty old camelback. I’m fond of that pack, despite it’s many shortcomings. It has lots of fun places to attach things, and carries around 2L of water. It has zero storage capacity, although you can shove like maybe a protein bar in with the bladder… but that’s it. So, if I want to bring my sketchbook, I usually shove the camelback in my larger Osprey daypack. The Osprey is a nice pack, lots of little pockets, but it’s aesthetically pleasing curves really limit what I can easily pack in there. I also use the Osprey for carrying (awkwardly) all my plein air painting gear - which, shouldnt take up all that much space but really stretches the limit for how much the Osprey can hold. Which, again, leaves room for maybe a protein bar.
Snack capacity should be a very important part of backpack design considerations.
So the idea was born, could I design a small daypack that could carry a few snacks, sketching stuff, and my hydration bladder or all of my plein air painting stuff, tripod, and lunch?
One thing I noticed while making small practice packs for my daughter is that all the fun little pockets in commercial packs that are barely large enough for anything practical really eat into the total storage capacity - keeping a pack simple greatly increases it’s storage capacity, even if it technically has the same volume designation.
Also, while curves are pleasing, they really suck for packing things. With these ideas in mind I set out to make a prototype pack out of some cheap ripstop.
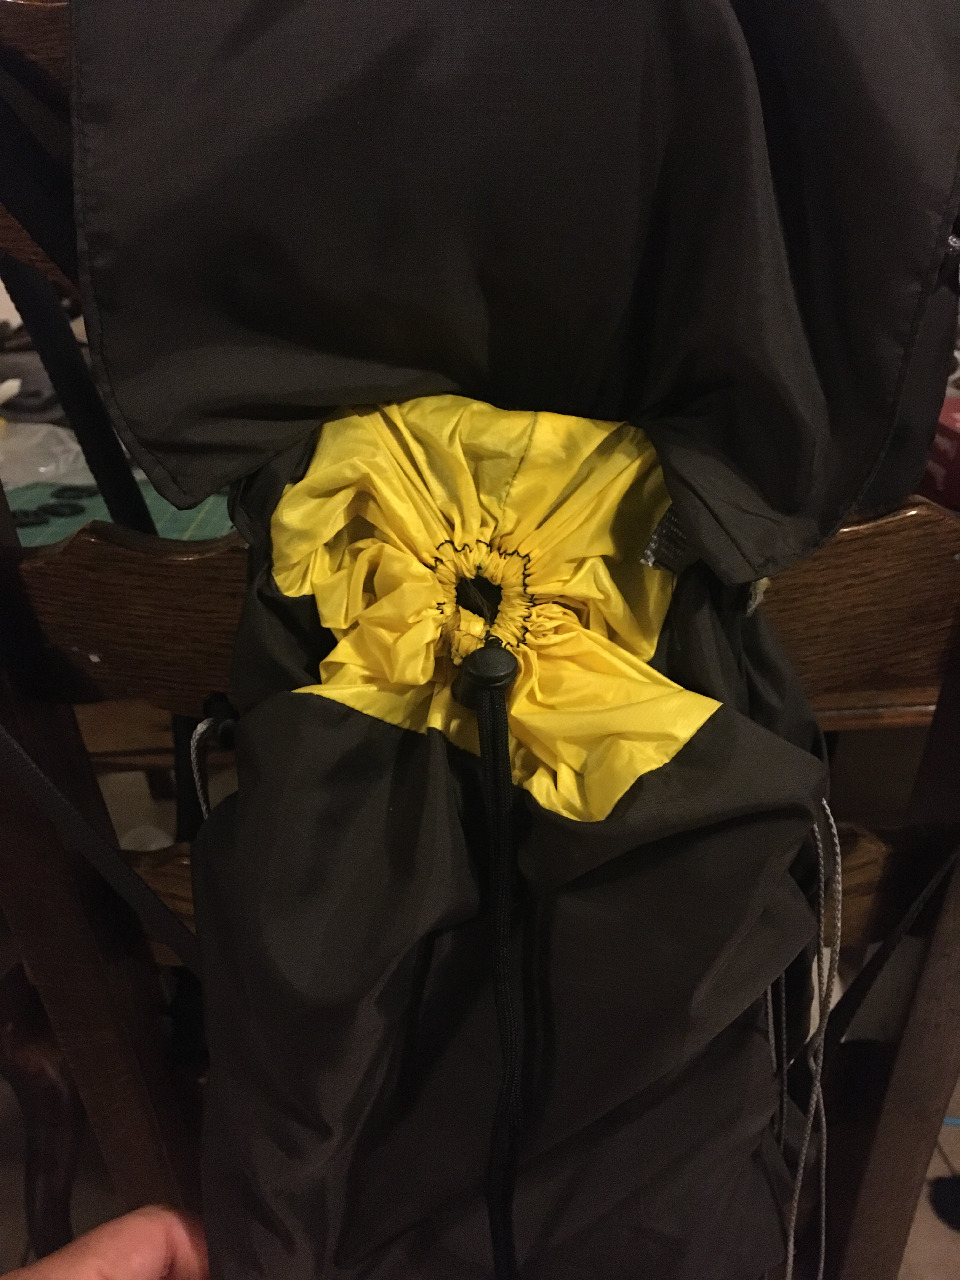
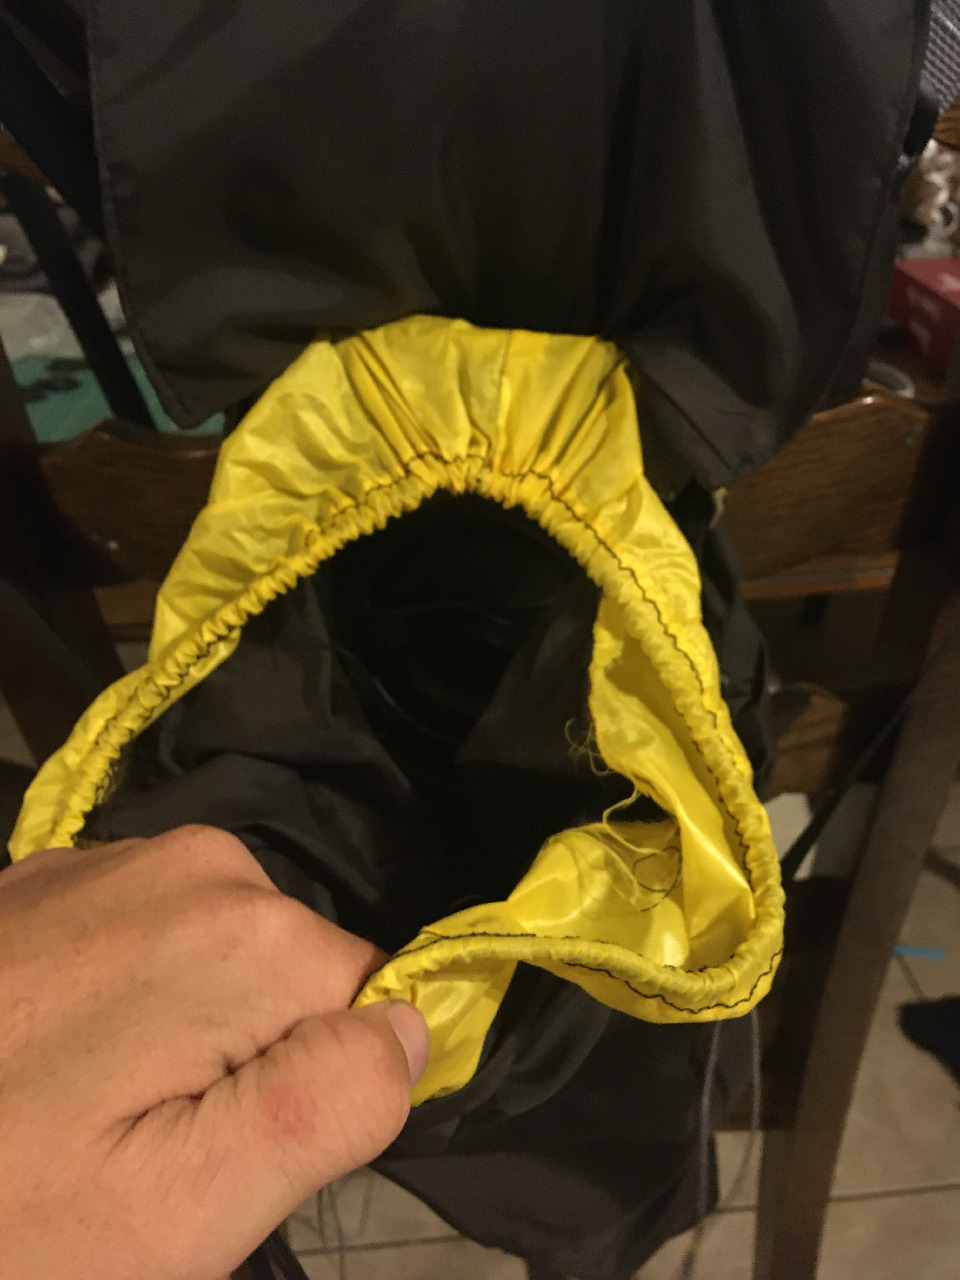
Cool flap with zippered pocket, compression ties on the side to reduce size, daisy chains on back, drawstring collar…Fancy right? Yeah too fancy… but the size was right. The top flap was kinda wonky on the prototype, and honestly it was more of a hassle to deal with then it was worth. The hydration tube exits were cool on paper - hilariously ineffecient in real life. I was convinced the idea was solid though, and ordered some fancy 420D Ripstop to make the next version.
Well, life got kinda crazy for everyone right around March this year, then we relocated from AZ to OR… Unfortunately a lot of my project ideas got put on the backburner until just recently. What’s really nice is I now have a garage with a couple workbenches I built - so my projects don’t take over the dining room table!
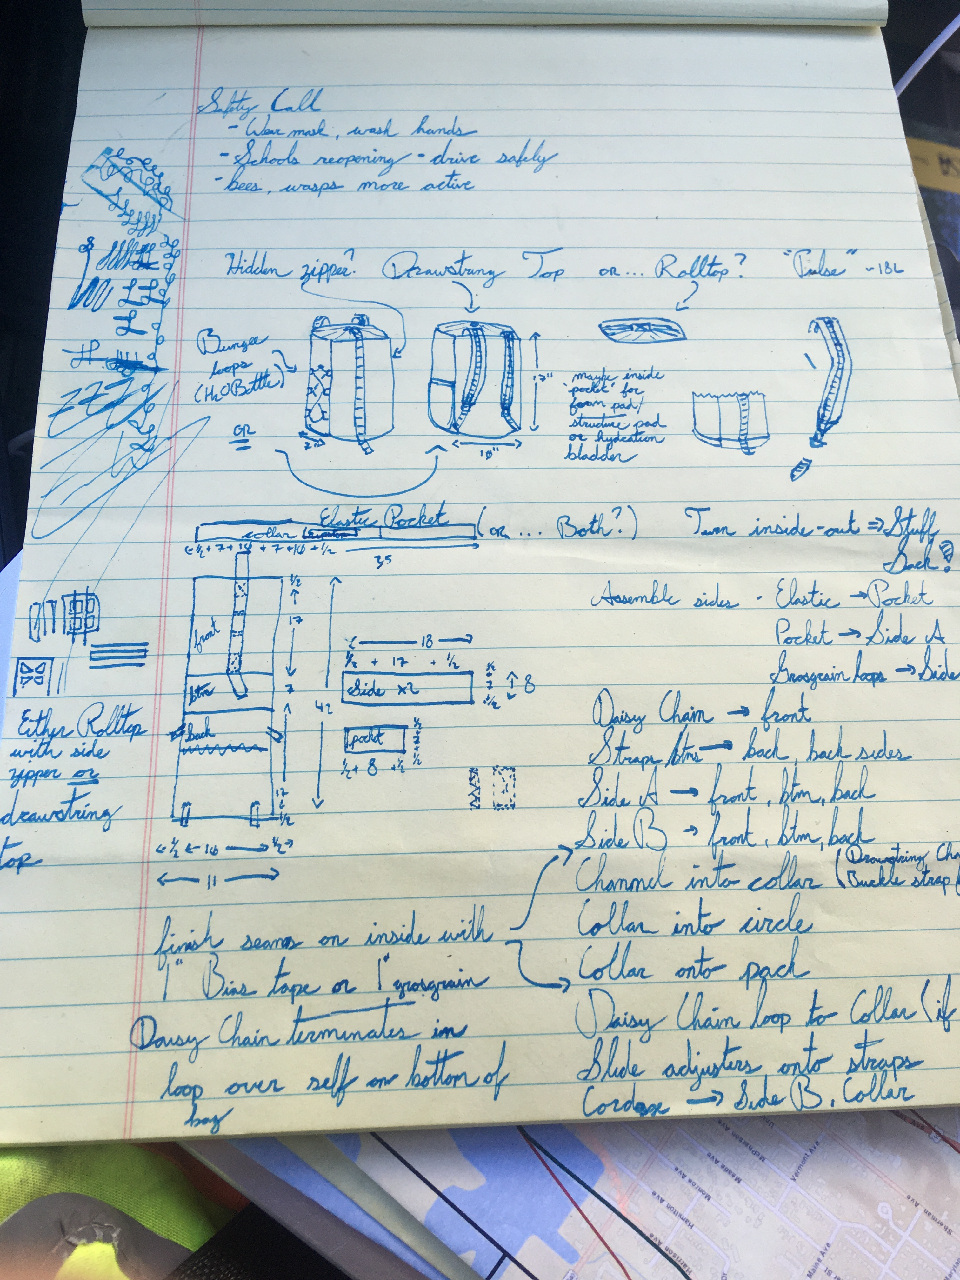
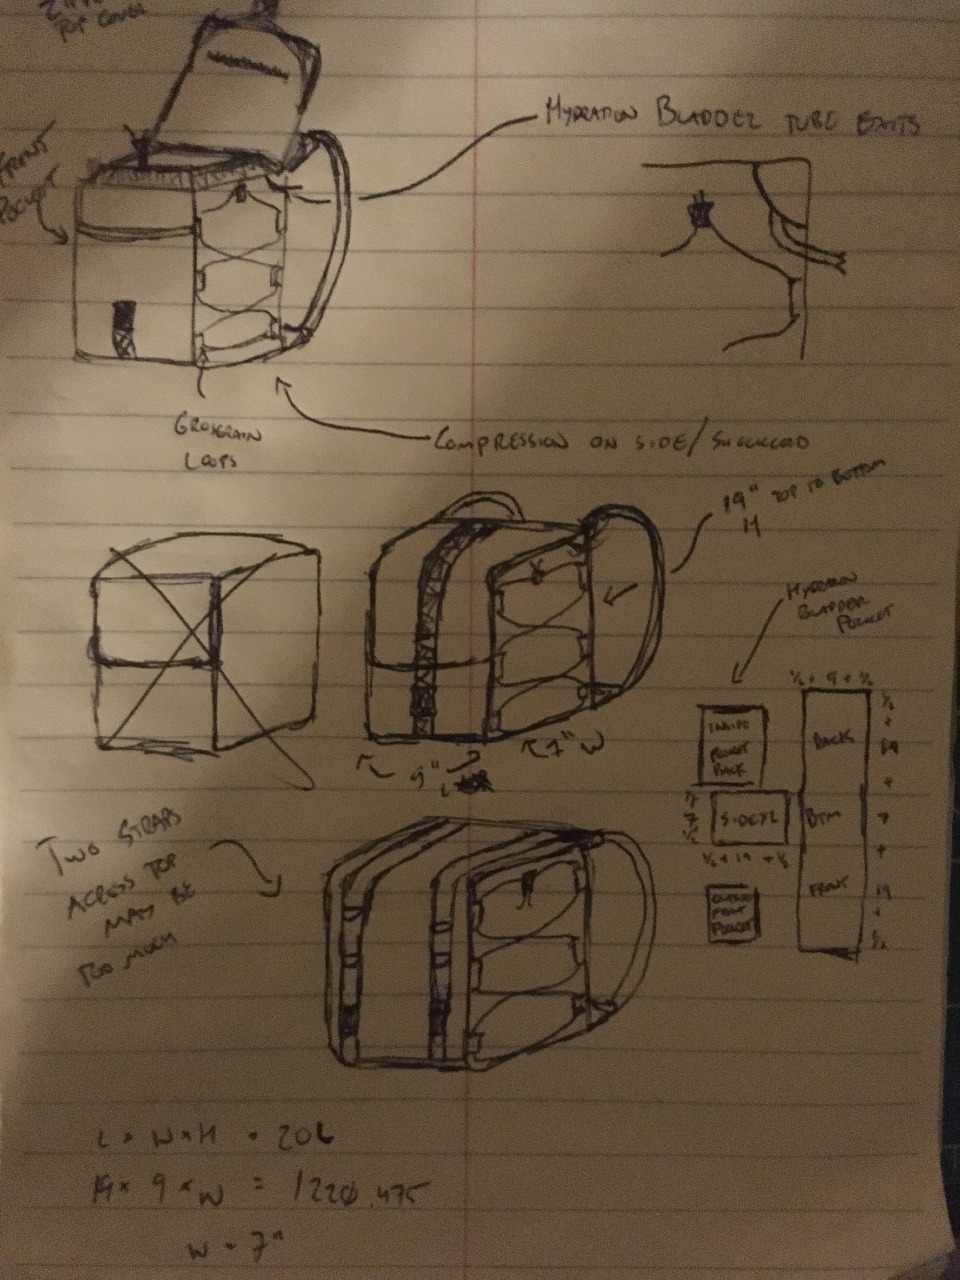
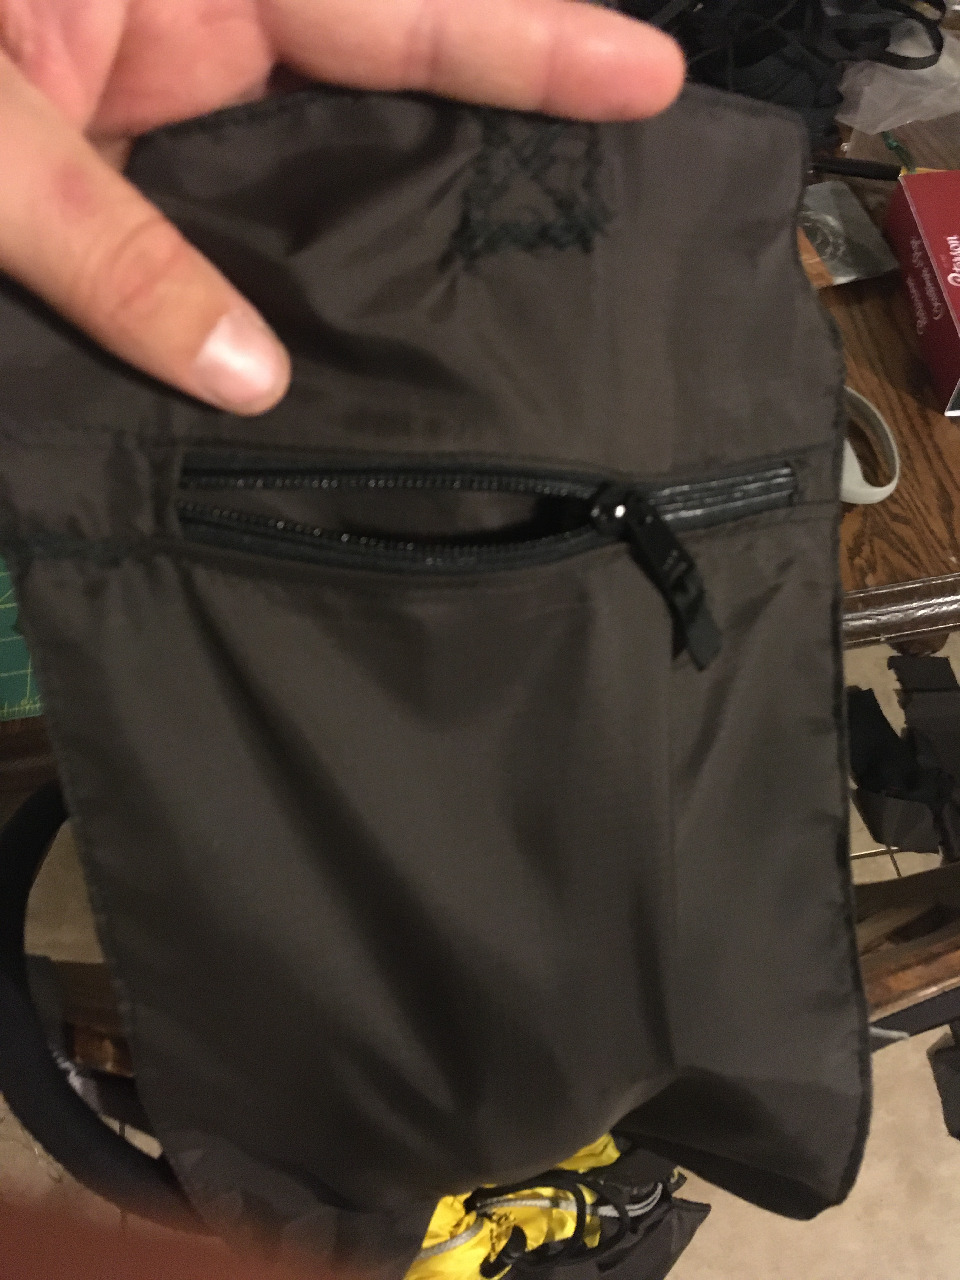
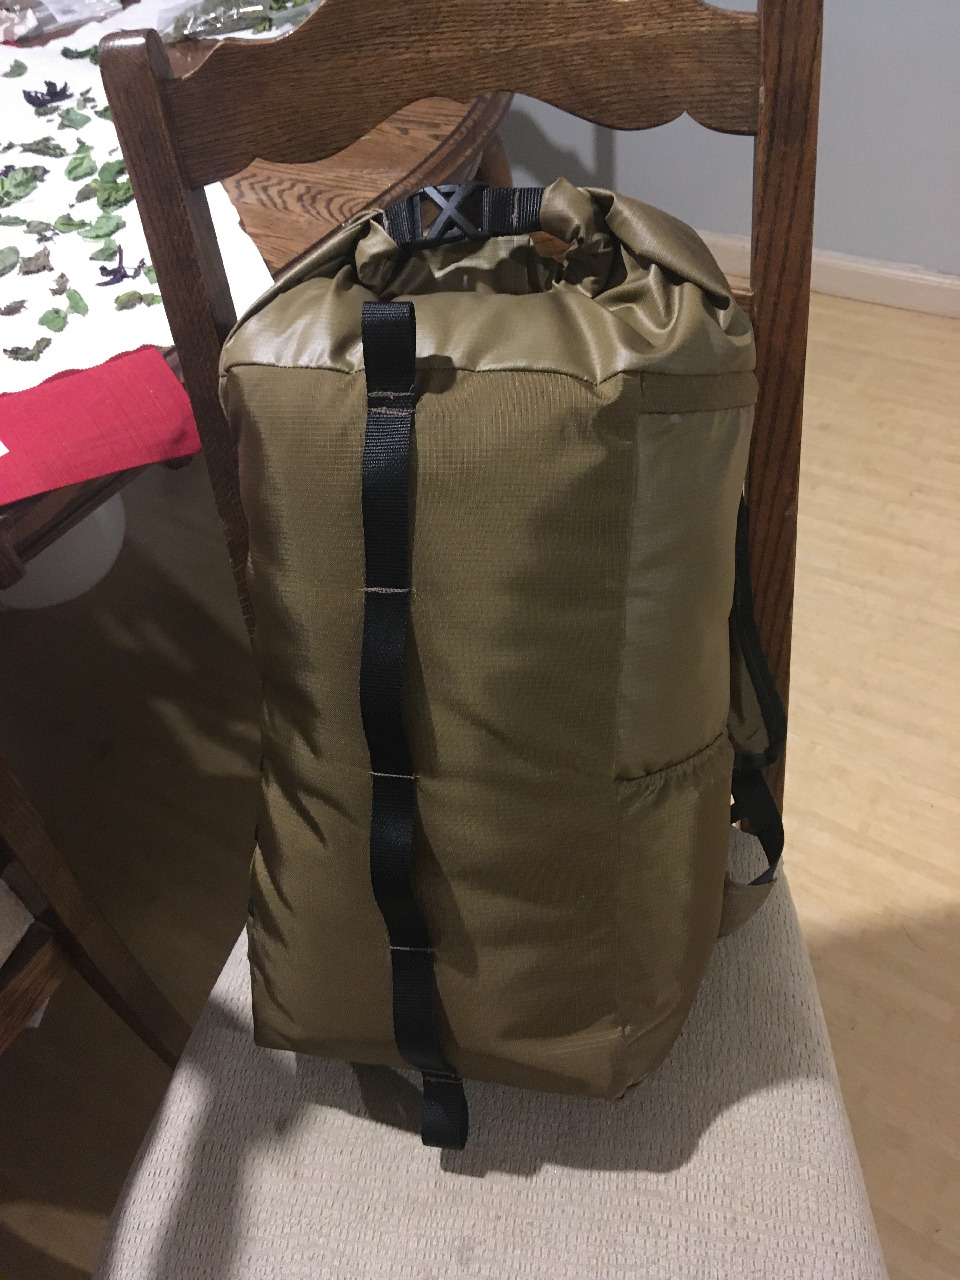
While at work I doodled this idea for version 2 of this ~18L pack. I got rid of the flap from the prototype, and decided to just go with either a drawstring top or a rolltop dry-bag style closure. I made room on one side for a little pocket with an elastic band, and the other side has the compression ties. Funny thing I noticed with the prototype - for a small pack you really only need to cinch down one side to reduce the volume! I also tried to plan out the build process a bit more, since the prototype was a pain to get everything together.
Derailing the Narrative Briefly…
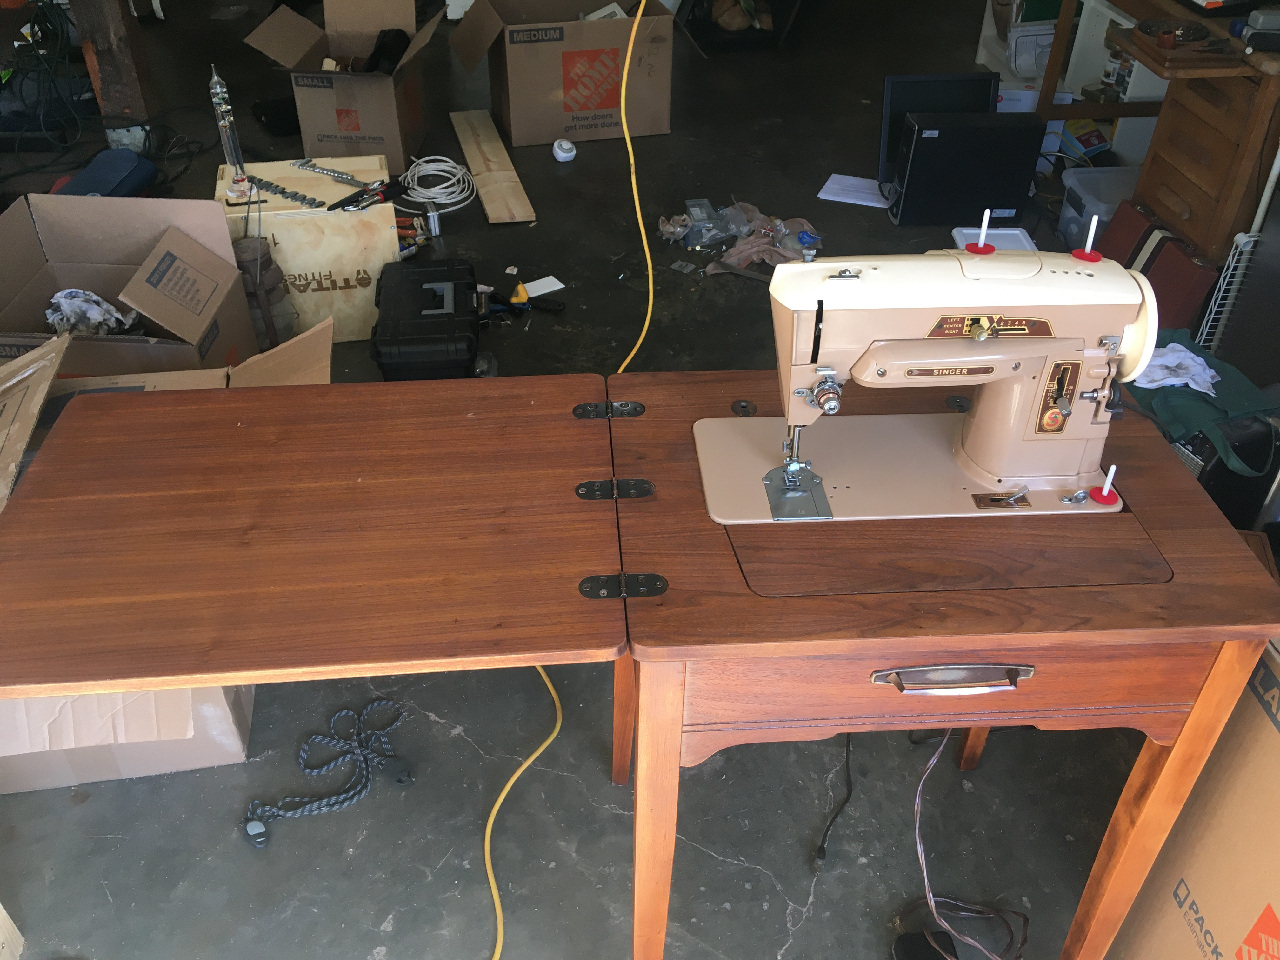
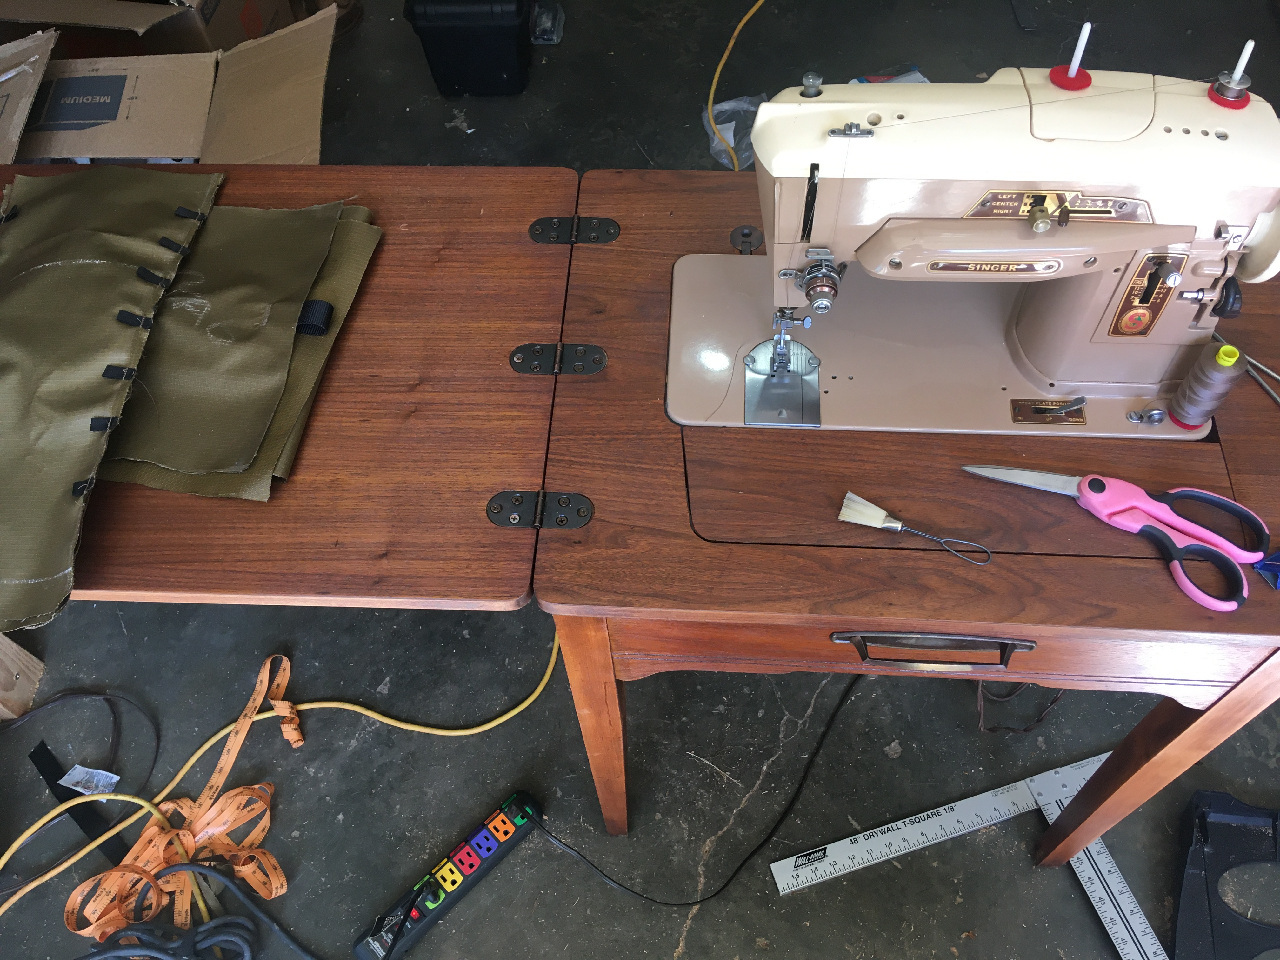
I have a pretty sweet setup going on in the garage now - my one bench works great for sprawling out stuff and notes, the sawhorses I built support a scrap piece of plywood to use as a cutting table, and then I found this excellent old Singer cabinet at a Goodwill…. it came with a beat up 401a, a vintage Husqavarna foot controller, and a box of assorted slant shank presser feet. The whole setup was an unbelievable 15 bucks - the table had a bunch of water stains, marker/pencil marks, gouges, and stickers. A bit of elbow grease, sandpaper, and stain/poly and it’s better than new! I took the beat up 401a out and put my beautiful 403a in.
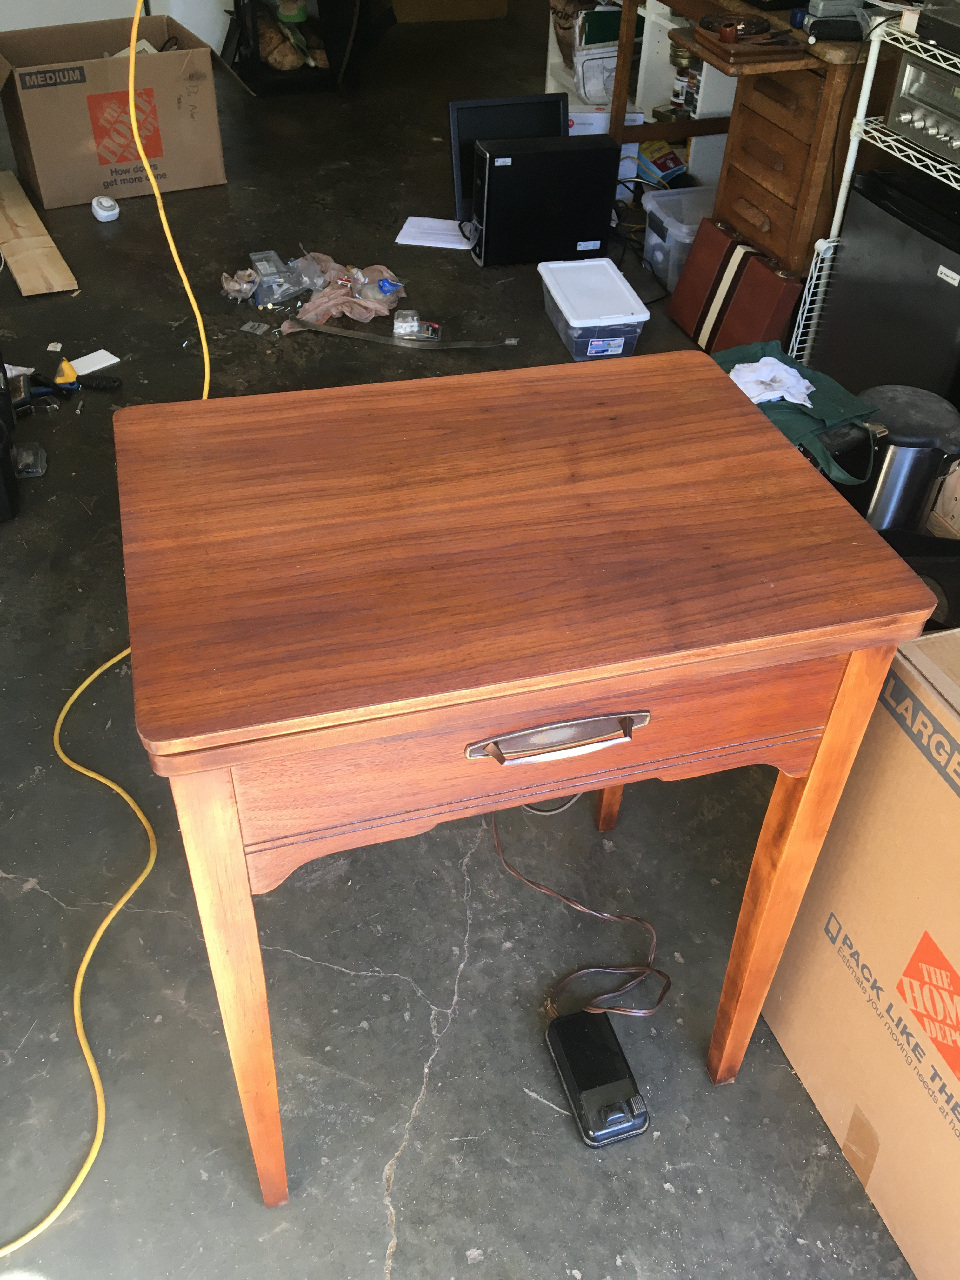
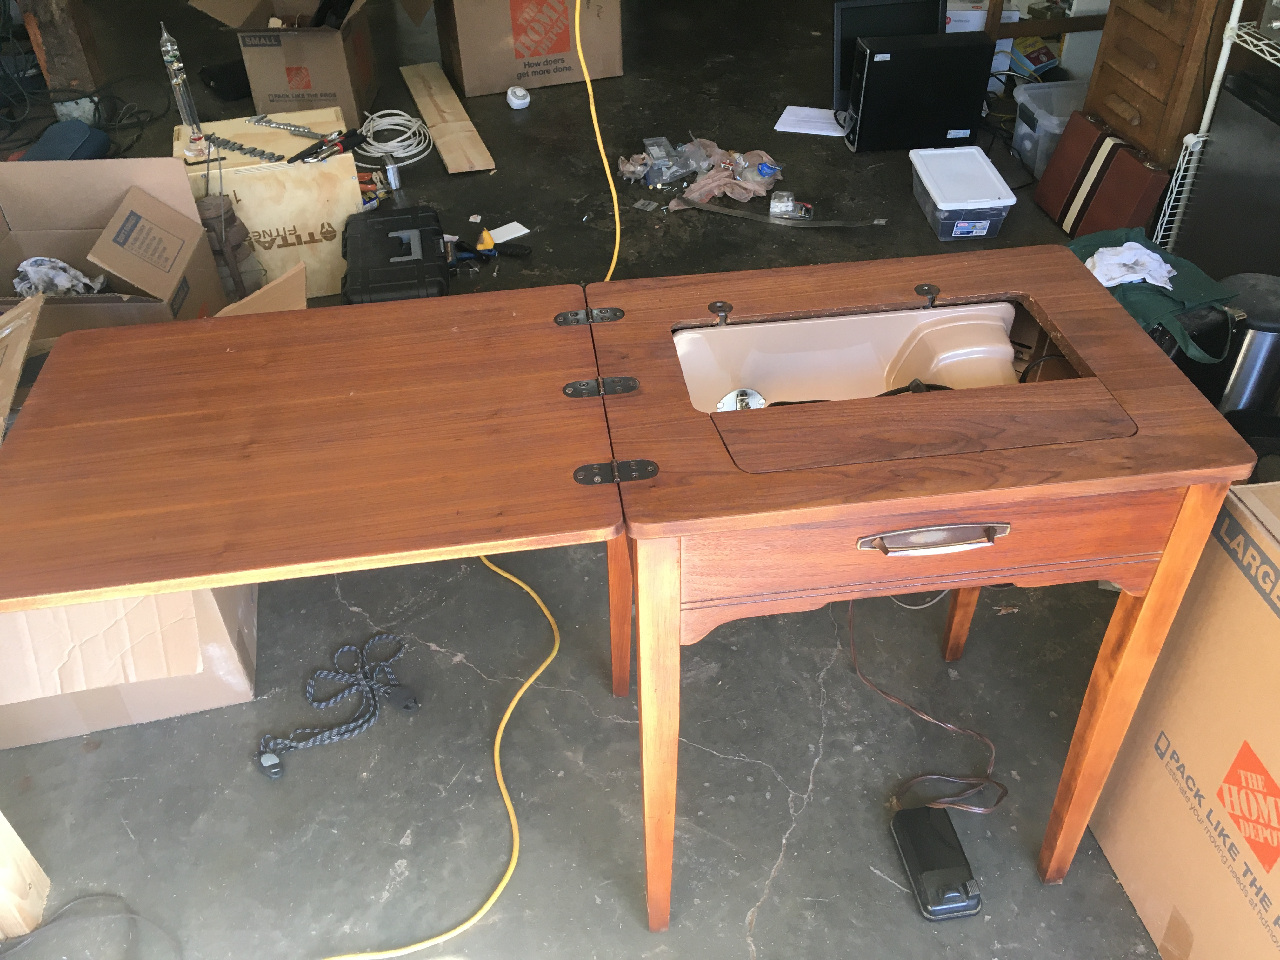
I should have taken before pictures - I’m pretty bad at remembering to do that. Believe me, the table was rough. Please excuse the random mess in the background - Mrs. Wilder kept asking me to clean up the garage but I kept getting distracted with projects! (I swear it’s clean now though)
The 401a I took out will have to be a post for another time - but the short version is I took her apart, cleaned and tuned her up, and she’s running/stitching beautifully now.
Back to the Build!
When I started the build I wasn’t sure how I was going to do the top - and it did not really matter since that would be the very last thing to sew on!
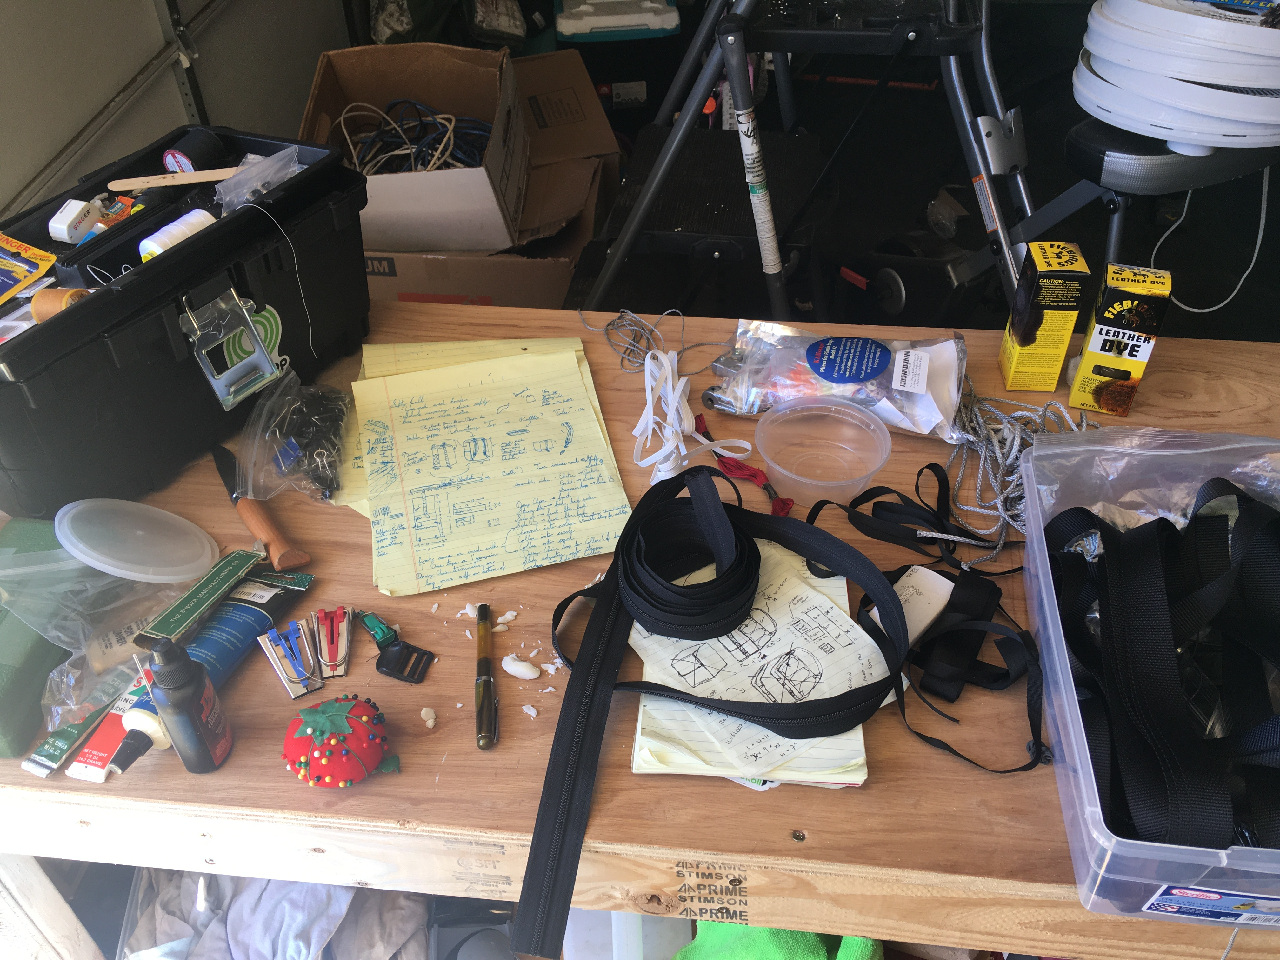
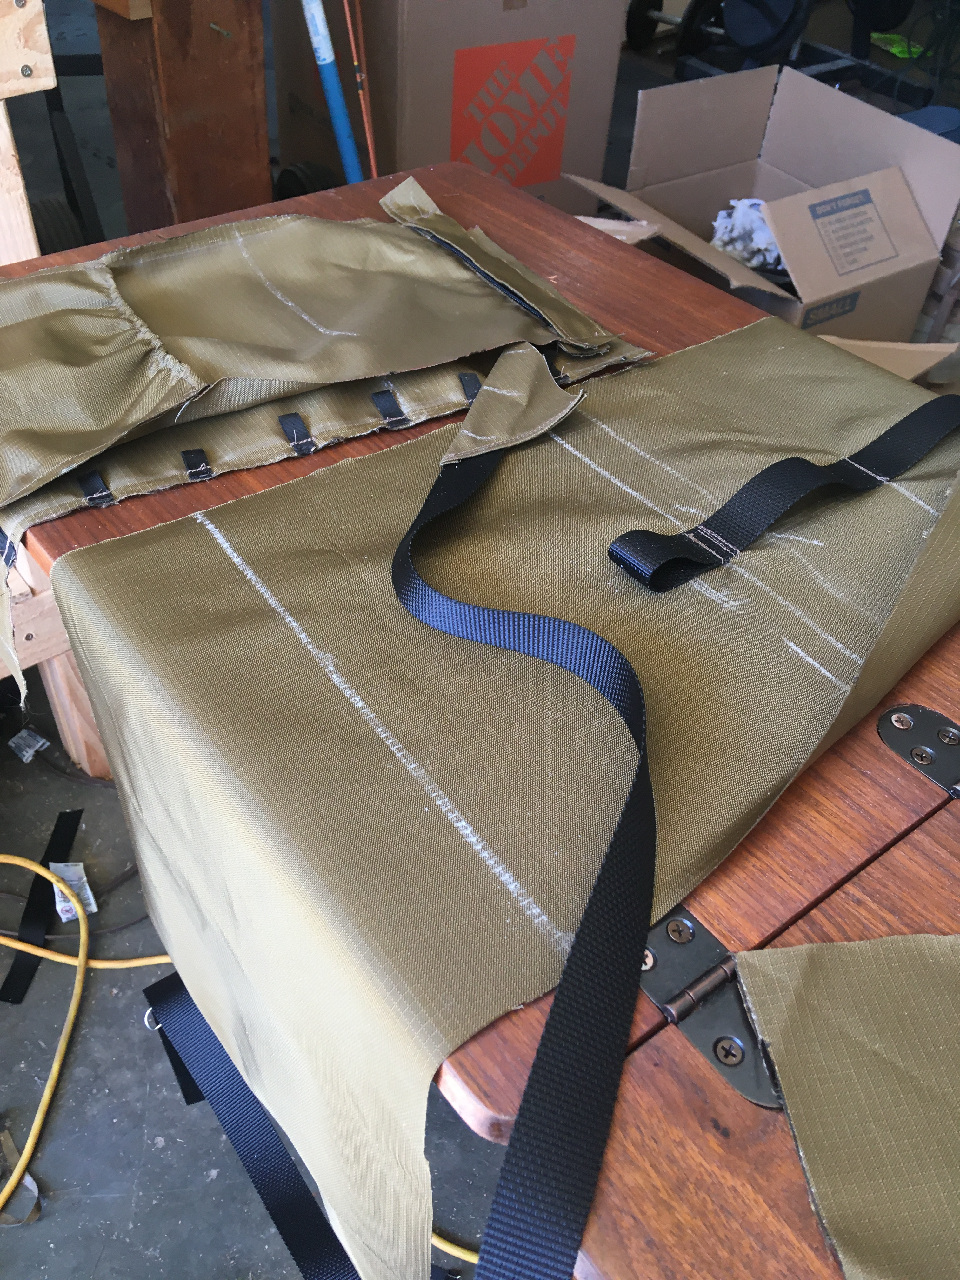
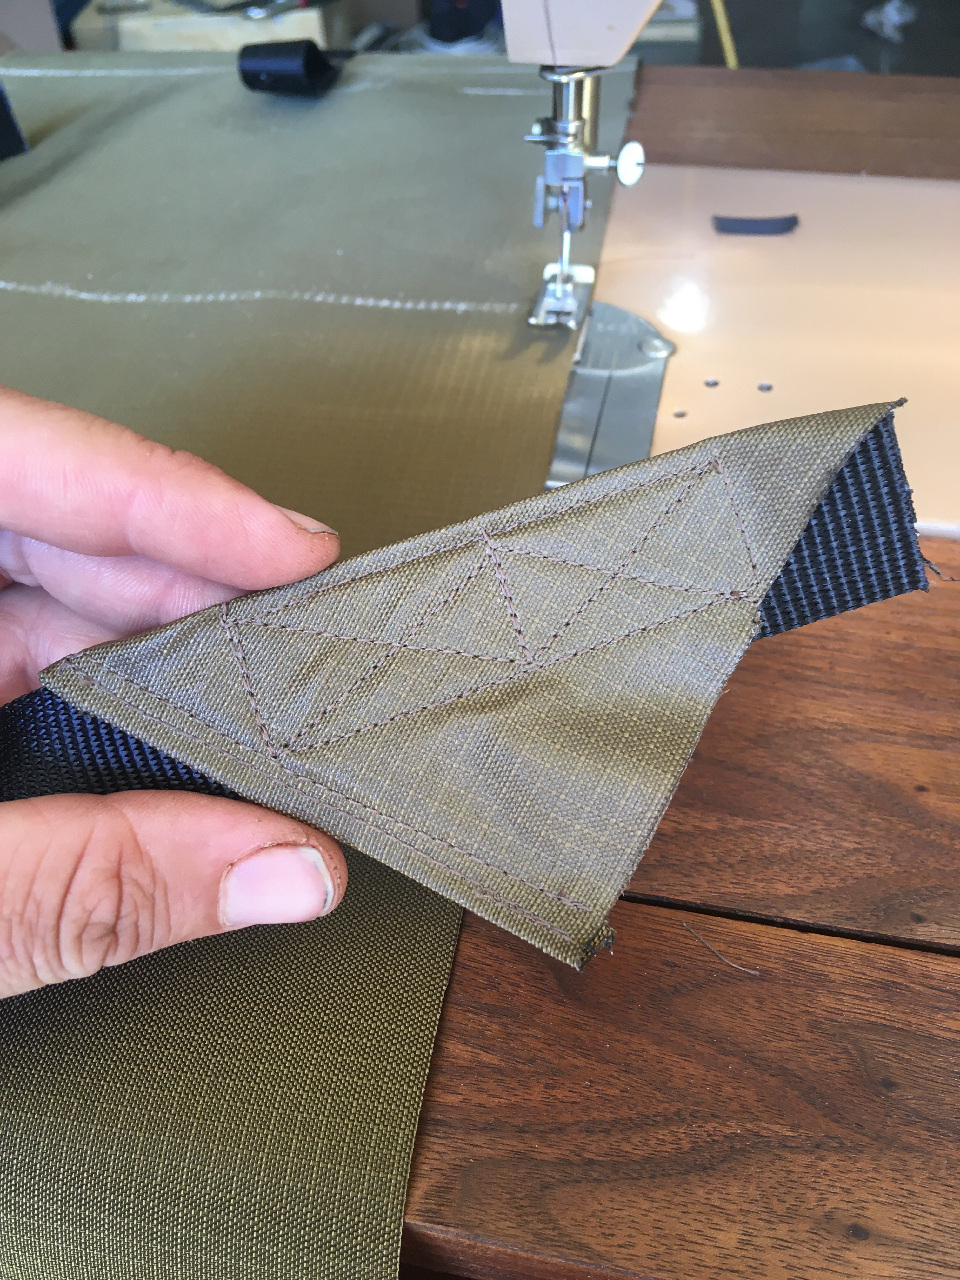
I started by assembling the sides and attaching the daisy chain to the back. one side has grosgrain loops for the cordage to go through, the other has the elastic pocket and a covered zipper on top for quick access and an easy hydration tube exit. The daisy chain has a loop at the top and bottom for clipping things on easily, and the straps are anchored into the side of the pack with these cool triangle pieces. After attaching the sides to the body with a 1/2” seam, I stitched an additional line at 1/4” and then covered the seam with 1/2” grosgrain stitched at 3/8”… overkill maybe, but I’m stoked with how sturdy it feels and nice it looks. The strap anchors got a couple of bar tacks as well where they tuck into the seam.

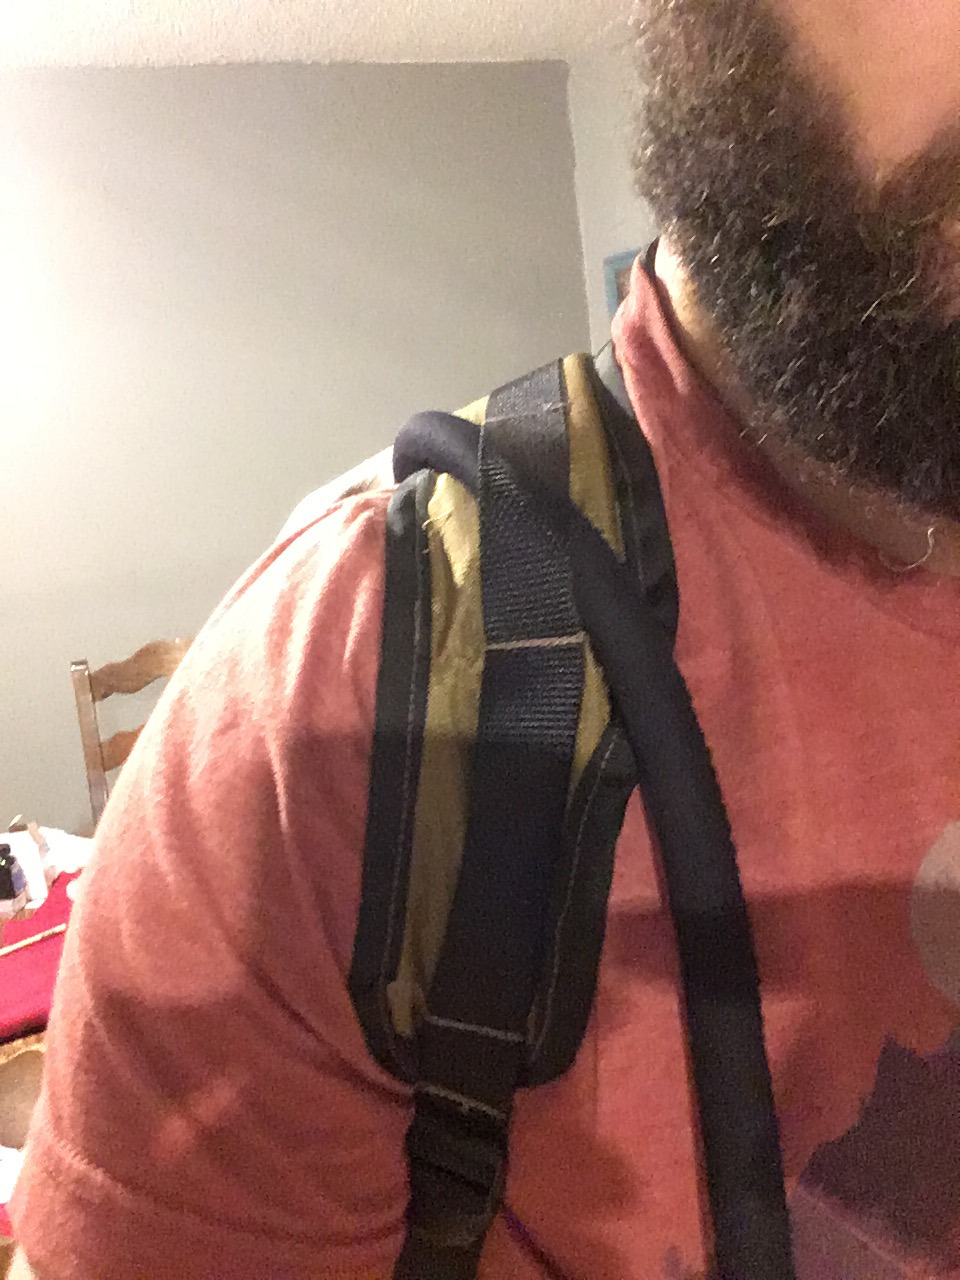
One of my biggest annoyances with commercial packs is the cheesegrater shoulder strap padding on every pack - and that the bulky padding goes the entire length of the strap! The prototype did away with all padding and just had the 1” poly shoulder strap… which was uncomfortable under load. So, I decided for this pack to make full straps, padded only for the first 8” (the only part that contacts your body really) with 1/2” closed cell foam padding (aka cheap blue sleeping pad from walmart).
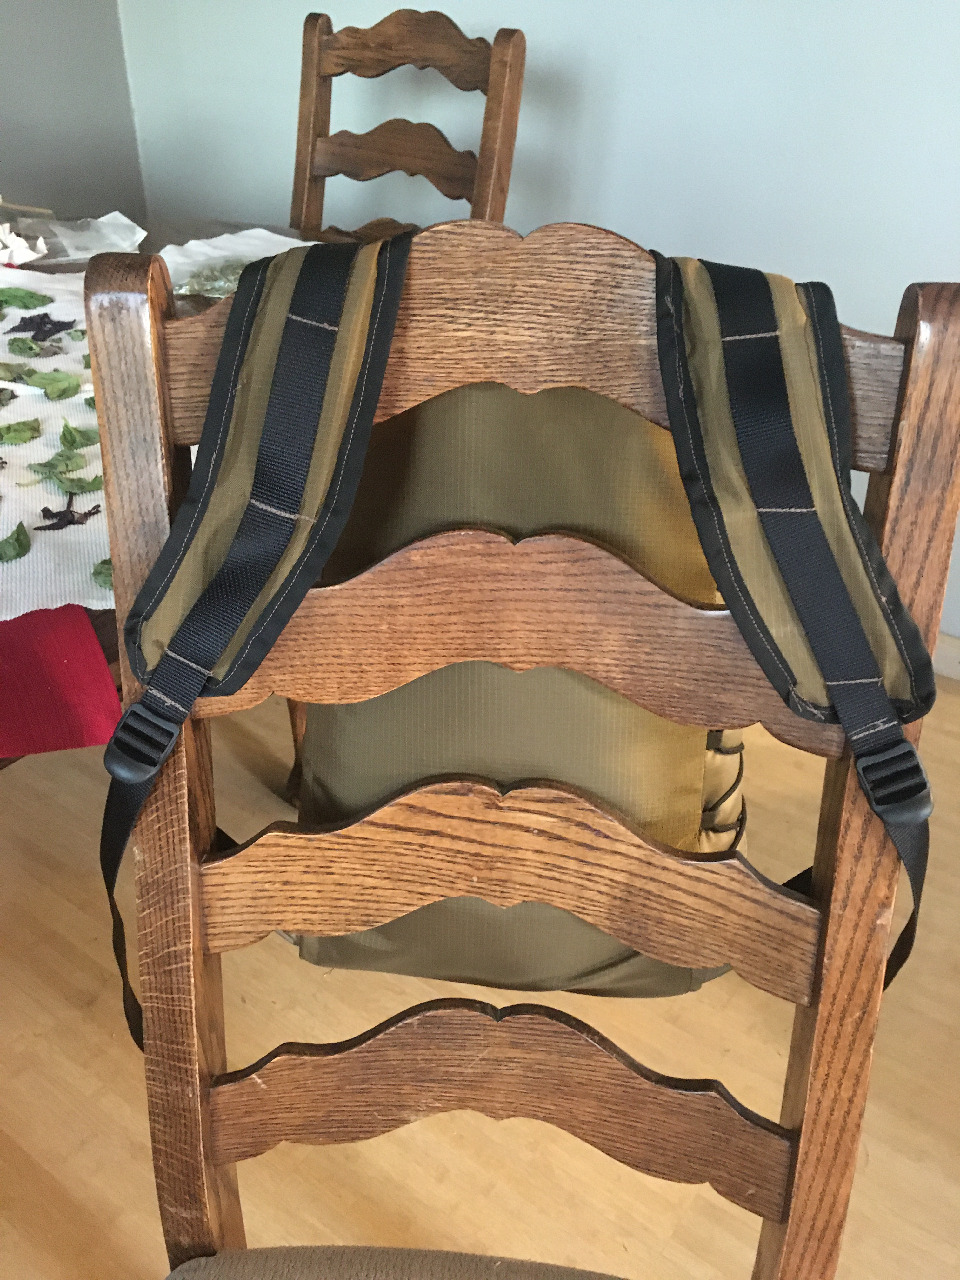
The shoulder straps are slightly curved, it comes off the pack straight across the shoulders and then in to the sides. I stitched the 1” poly strap a few times up the top part of the strap for a place to attach things, and maybe add a sternum strap later. I then sandwiched the foam in the strap, stitched across top and bottom to hold it in place, and around the edges. 1/2” grosgrain was used to clean up the raw edges, and makes the straps look pretty nice.
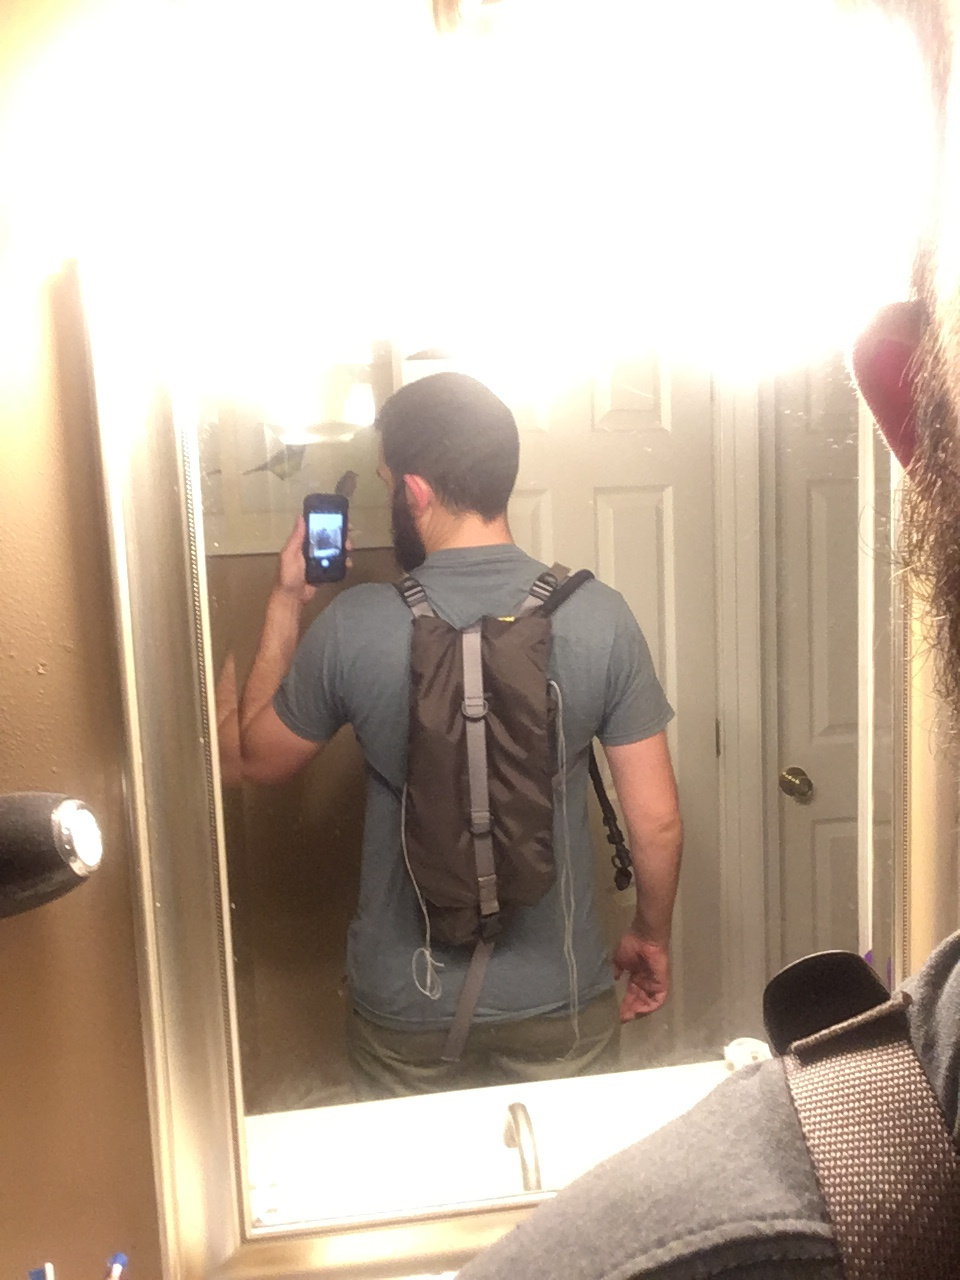
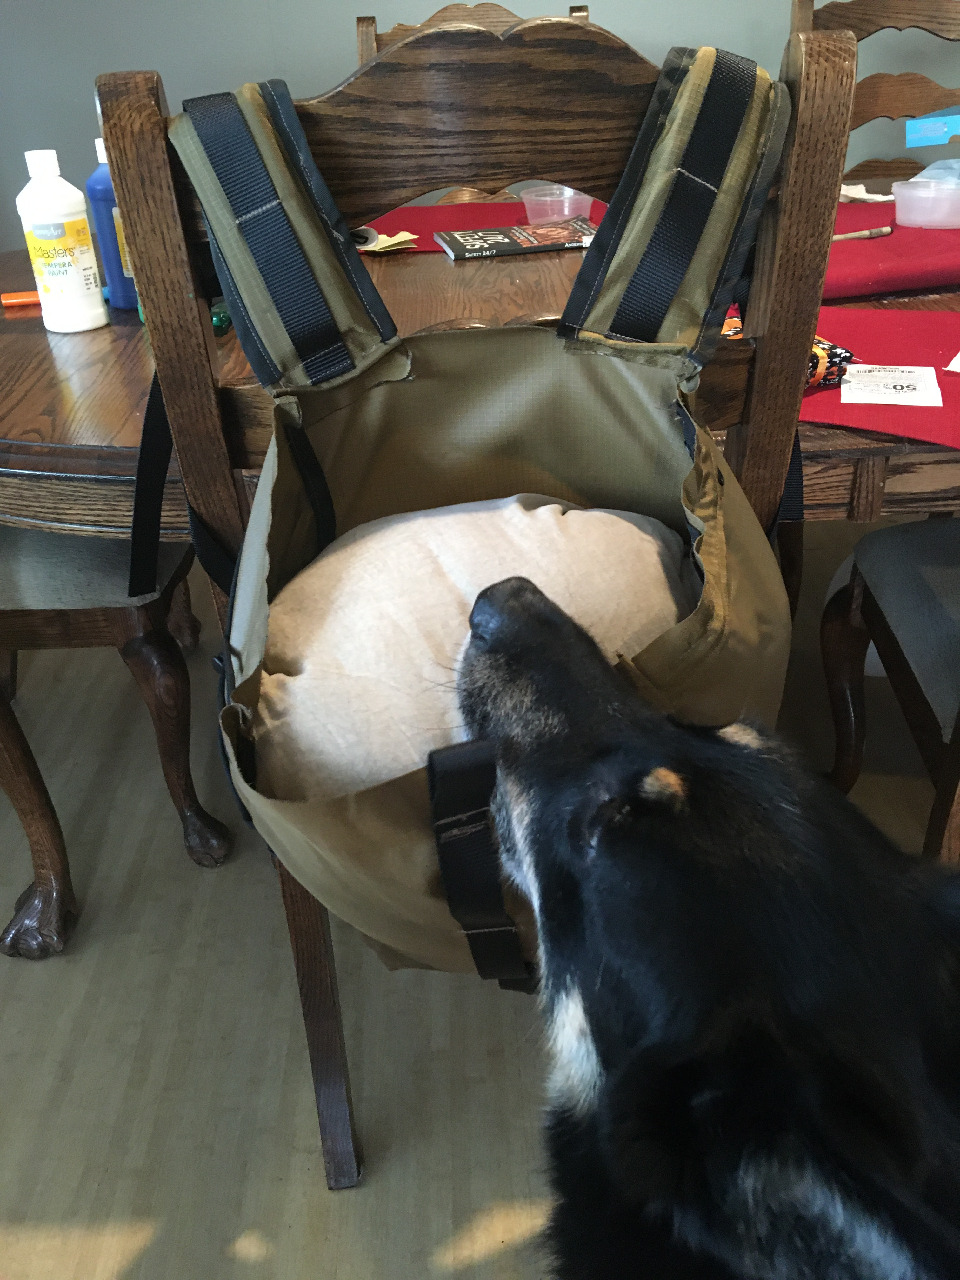
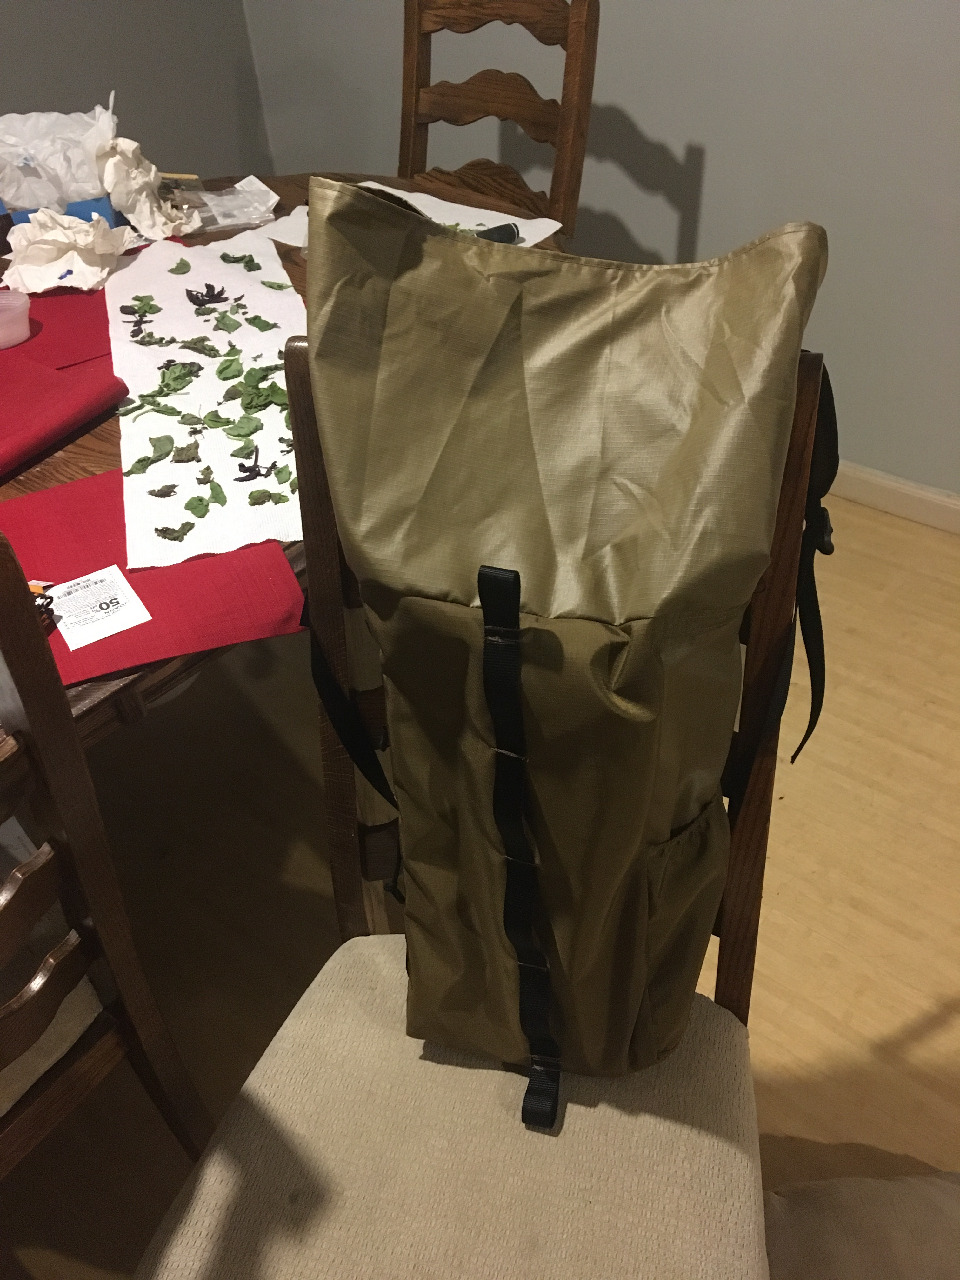
I couldn’t resist lacing up the side (550 paracord) and shoving a pillow in at this point to take a few pictures.
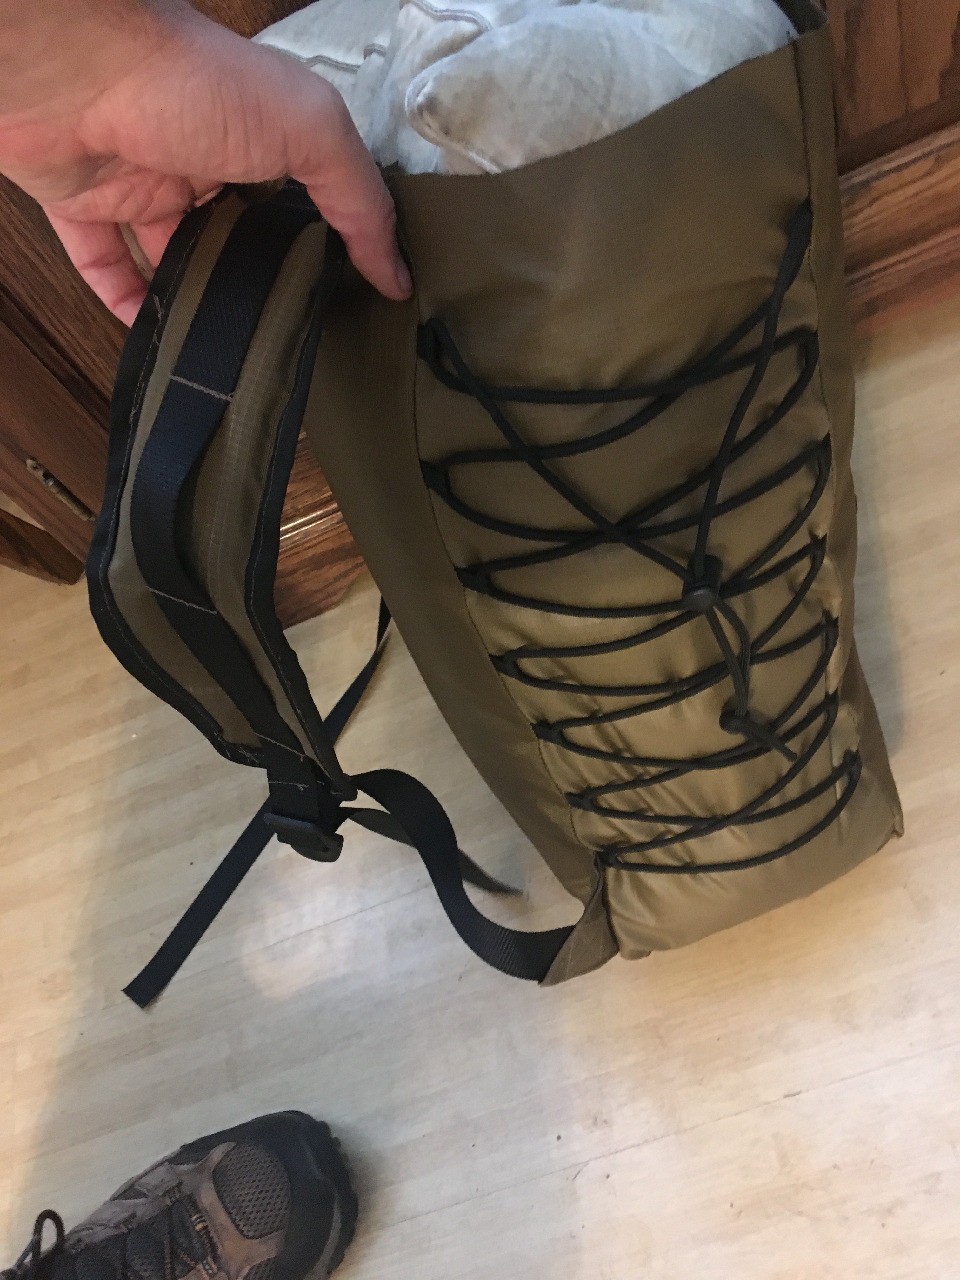
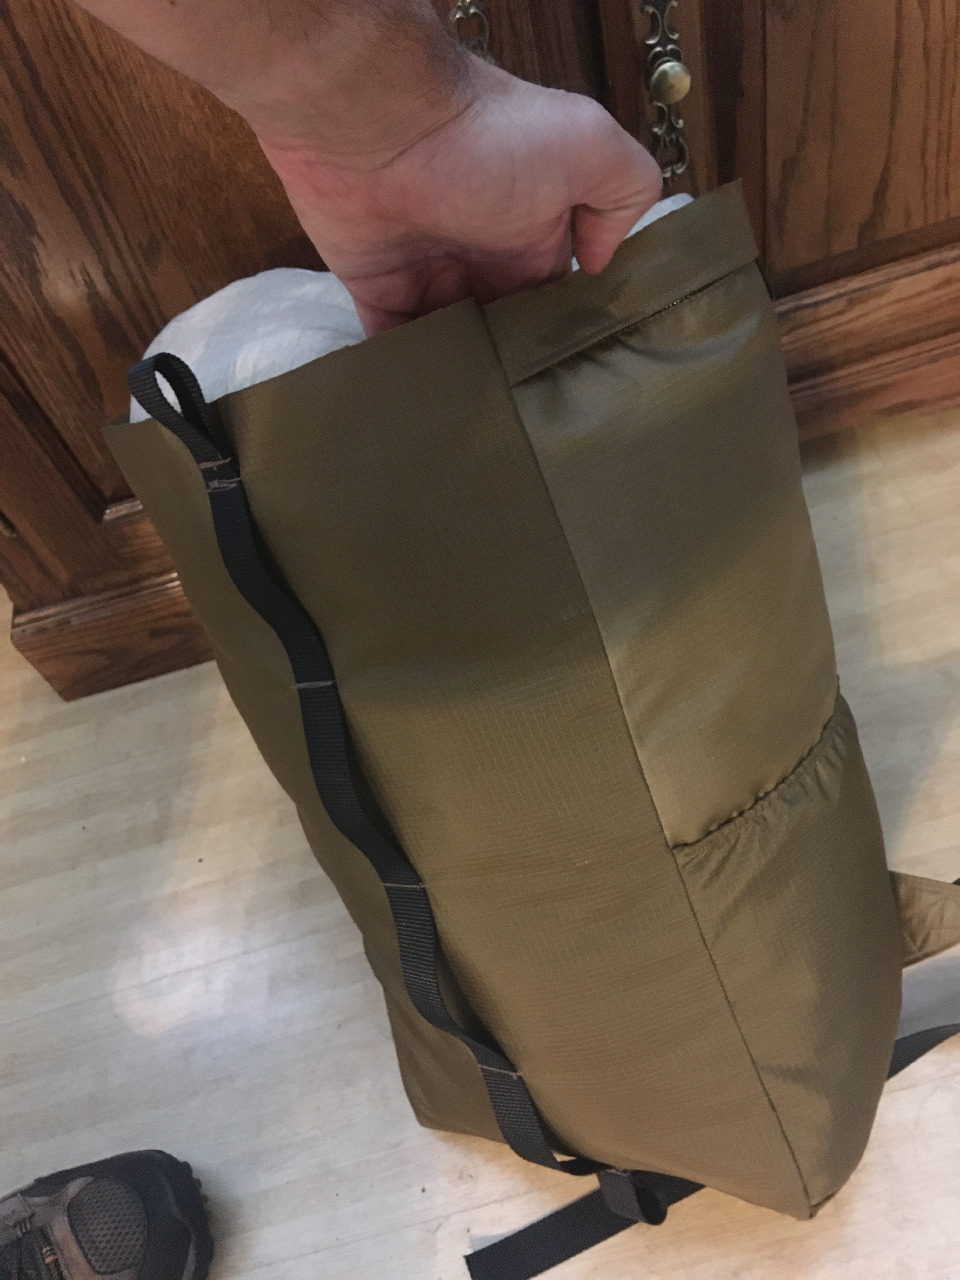
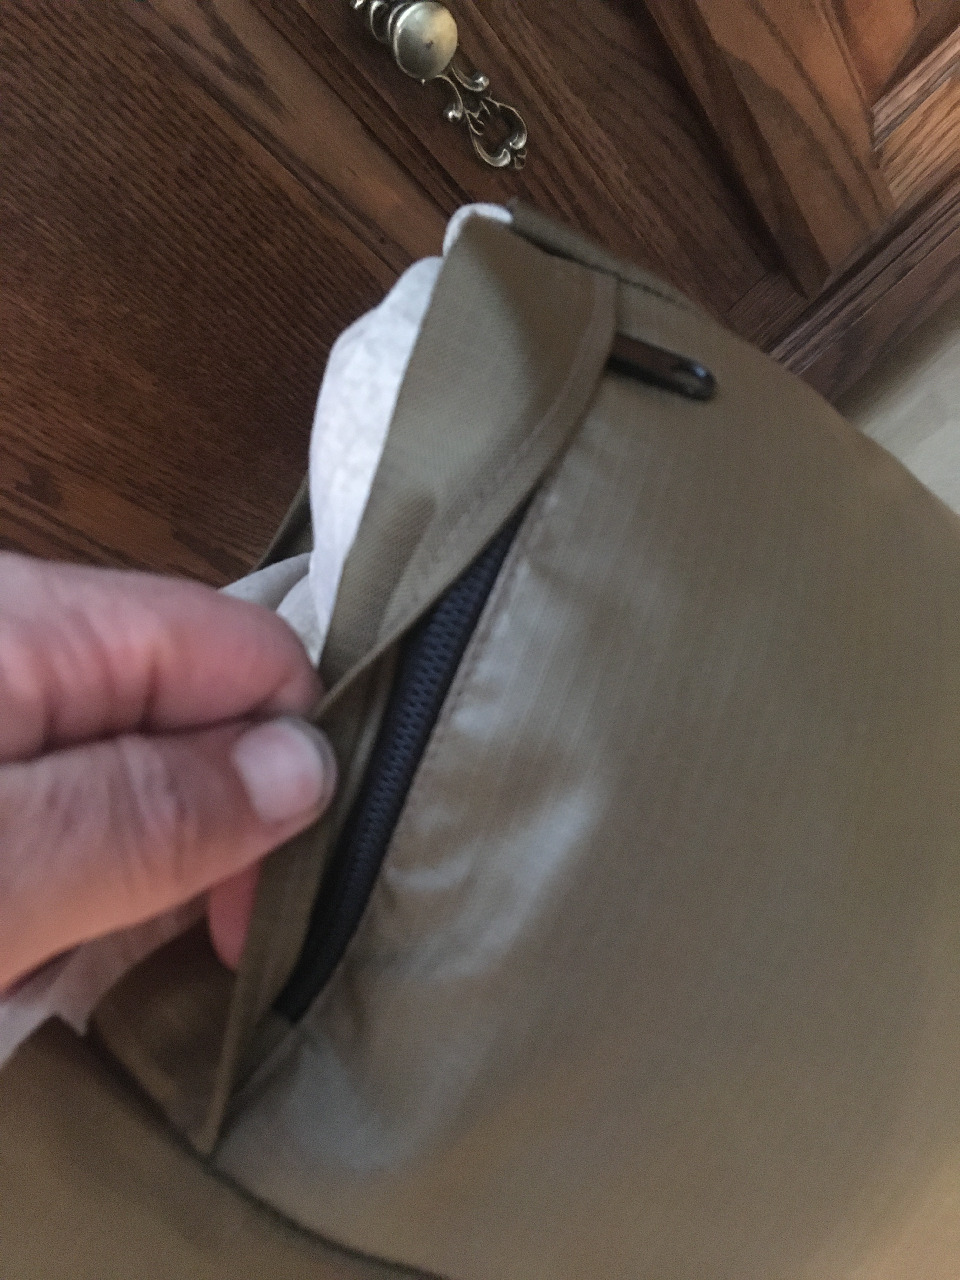
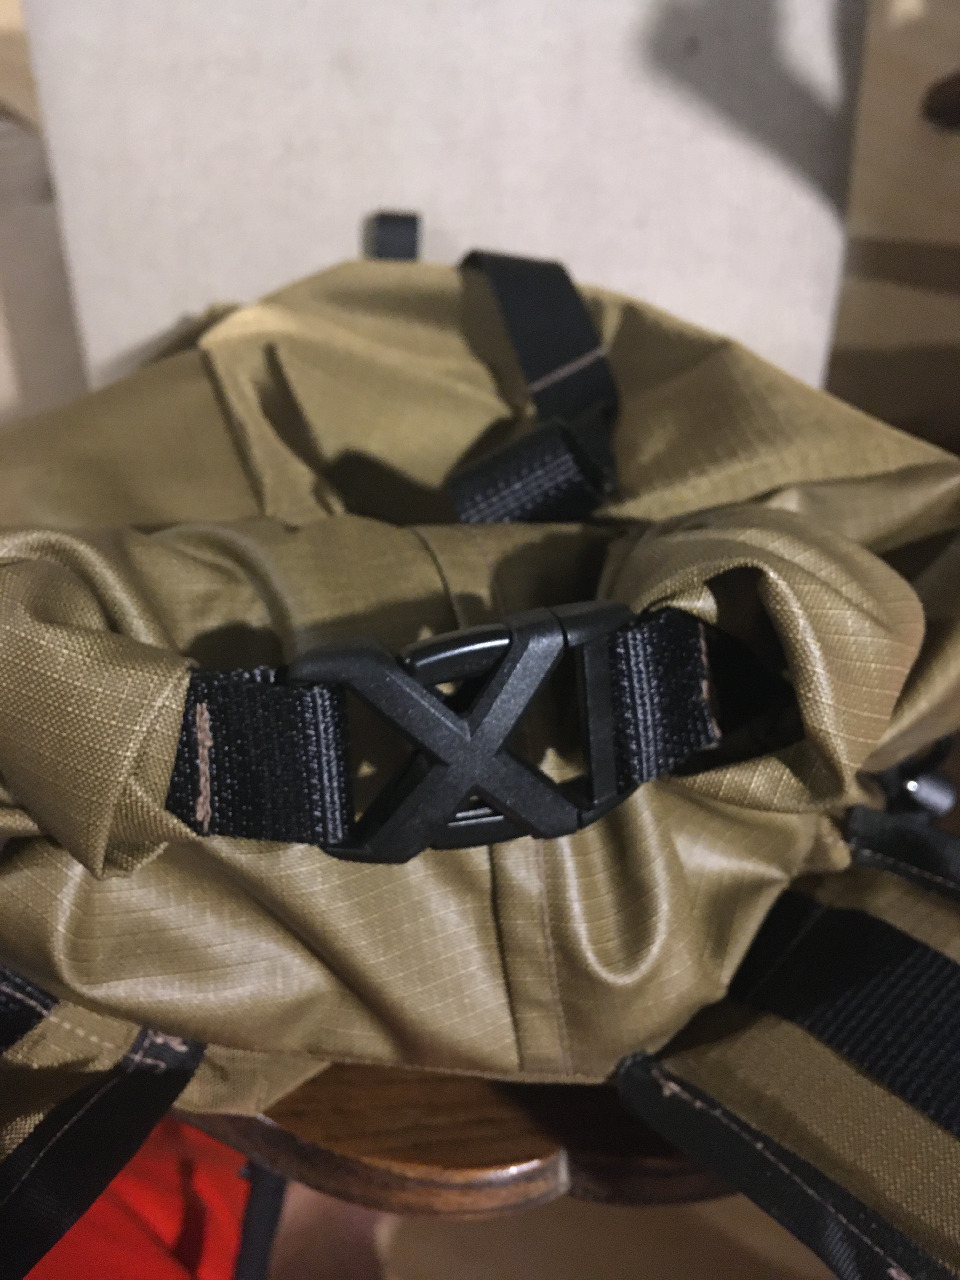
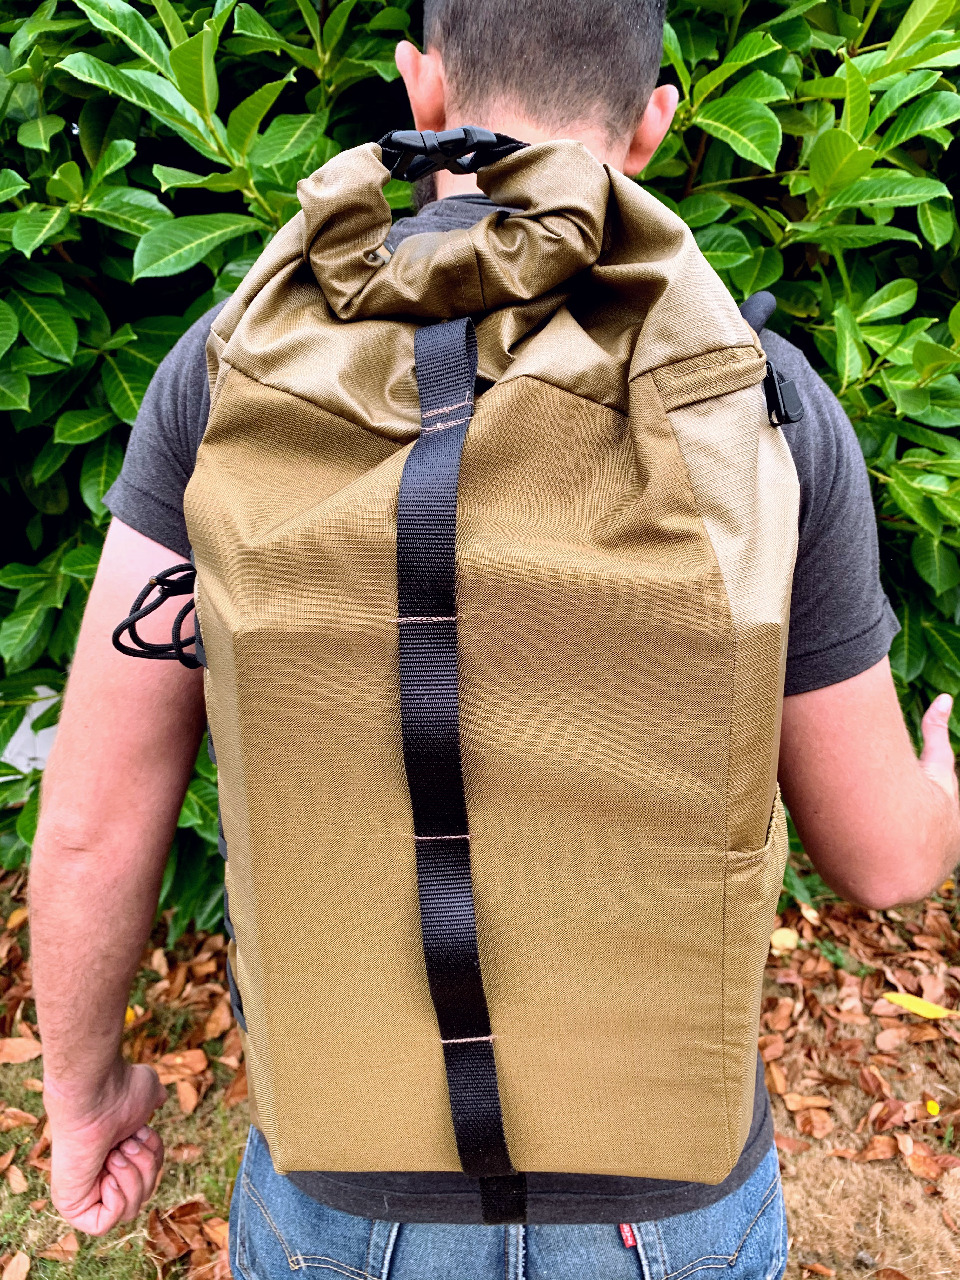
All that was left was the top at this point - and for that I decided to go with a dry-bag style rolltop closure. I made the collar pretty long, which ends up being nice if you need just a bit more space (for snacks) on top of whatever you’re carrying. The strap on the top for the rolltop action should be just a couple inches longer than I made it - but it still works great. I have these fun “X” buckles that I picked up on a whim, so the closure features those. The zipper for the quick access/hydration tube is a bit high on the side - might be better if it’s moved down a bit. The tube slides nicely into the strap daisy chain to hold it in place, and the pack is extemely comfortable loaded up with stuff.

I’ll be field testing the pack over the next couple months before drafting version 3 - but this might be the first actually useable pack I’ve made. Comfortable, durable, water resistant, and plenty of room - for snacks.